


Redesigning Zoho CRM record pages with Canvas: the short answer
Redesigning Zoho CRM record pages with Canvas works best when you start from what each team does on a record. List the fields they read, the fields they edit and the actions they take. Then build one screen that puts those first. Build and test it in a sandbox, and deploy it to production only after the team has tried it.
Most record pages grow by accident. Every new field lands at the bottom of a long form. After a few years, a salesperson scrolls past forty fields to find the closing date. Canvas lets you change that without code. You decide what sits at the top, what moves into a tab and what each team never needs to see.
This guide covers the full route. You plan around tasks, sketch a worked example for a sales team and build it in a sandbox. You make it fit smaller screens with Flex, keep it consistent with presets and deploy it safely. If you are new to the system itself, the beginner's guide to Zoho CRM gives the background.
What Canvas is and what it can change on a record page
Canvas is Zoho CRM's no-code design tool for creating custom layouts for record detail pages, list views and data entry forms using a drag-and-drop builder. Zoho describes it as a way to build custom interfaces for Zoho CRM on desktop and mobile. A record detail page is the screen you see when you open a single lead, contact, account or deal.
On that page, Canvas gives you control over several kinds of element:
- Fields, placed and grouped wherever you choose.
- Buttons and Universal icons for quick actions and navigation.
- Related lists, with their look and feel changed at a granular level.
- Tabs, which organise information into concise, legible views.
- Widgets, alongside fields and related lists.
Zoho also lets you style these elements. The style options include background, padding, border, radius, depth and visibility. When you drag a field or button onto the page, the Style tab opens straight away.
The point of Canvas is not decoration. Zoho's own description is to design practical and contextual views for every team, with fields, related lists and widgets that speak to their role. That is the brief to hold on to. A record page should help someone finish a task, not show every field the organisation has ever created.
Plan the layout around what each team does on a record
Plan a Canvas page by watching people work, not by opening the builder. A salesperson, an account manager and a finance colleague open the same deal for different reasons. Each needs different fields near the top and different buttons within reach.
For each team that uses a module, write down four things:
- The question they are answering when they open the record.
- The fields they read to answer it.
- The fields they change, and how often.
- The actions they take next, such as sending an email or logging a call.
Then mark everything else on the current layout as either "occasionally needed" or "never needed by this team". Occasional fields can move into a tab. Fields a team never needs can stay off their page.
At Svennis we sit with the people who use a module and watch them work through real records before we draw anything. The fields they actually touch are rarely the ones the original layout puts at the top. That short observation stops you from rebuilding the old form with nicer colours.
Keep the list of teams short. A separate page for every job title is hard to maintain. Group people whose tasks overlap, and design one page per group. If your CRM still reflects a process you no longer follow, fix the process first; our post on how to customise your CRM covers that wider work.
Worked example: a deal record page for a sales team
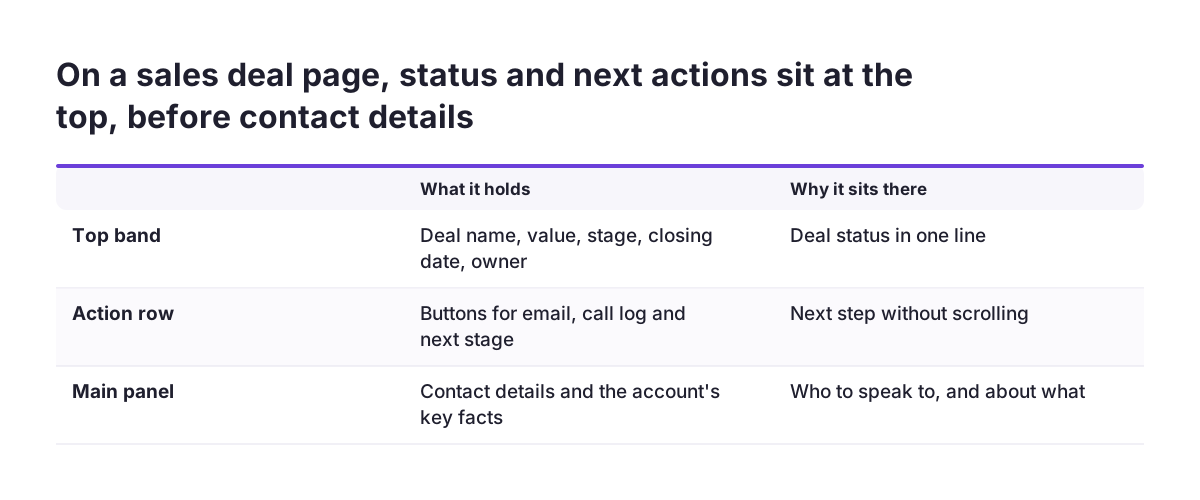
A sales team's deal page should answer one question in a glance: what do I do next on this deal? Take a small UK sales team that works its deals in Zoho CRM. Their current deal page is a long standard form, and the next action sits halfway down.
After a planning session, the team agrees what each part of the new Canvas page should hold:
| Page area | What it holds | Why the team wants it there |
|---|---|---|
| Top band | Deal name, value, stage, closing date, owner | The status of the deal in one line |
| Action row | Buttons for email, call log and the next stage | The next step without scrolling |
| Main panel | Contact details and the account's key facts | Who to speak to, and about what |
| Related lists | Open activities and recent emails | What already happened on the deal |
| Tab: Admin | Lead source, internal reference, billing fields | Needed occasionally, not every day |
Notice what the table does not contain. It has no colour scheme and no font choices. Those come later, from presets. The plan only fixes which information goes where, based on the tasks above.
A finance colleague who opens the same deal would get a different page, with billing fields at the top and the sales actions moved aside. Canvas assignment, one of the Canvas items the sandbox carries over, is how a page reaches the people meant to use it. Design both pages from the same task list so they stay consistent.
Building the Canvas page in a sandbox, step by step
Build every new Canvas page in a sandbox before anyone uses it in production. A sandbox is an environment that mimics production. You can test real business scenarios with CRM data, then deploy configurations to production without touching the original data. Zoho CRM offers four types of sandbox.
Zoho's help page on testing Canvas in a sandbox sets out the route. For the deal page in the worked example, the steps are:
- Check your permissions. Users with the Manage Customization permission can create Canvas pages. Users with Manage Sandbox permission can deploy Canvas changes to production.
- Create the sandbox. If you choose All in Configurations Available in Sandbox, Canvas is included. If you choose Selected, tick Canvas in the Items availability in Sandbox pop-up.
- Confirm what came across. Your existing Canvas pages, presets, reusable components, images, Canvas assignment and Canvas rules at the time of creation are all available in the sandbox.
- Build the deal page. Create a new record detail page for the module and drag in the fields, buttons, tabs and related lists from your plan.
- Test with real tasks. Ask two or three salespeople to work sample deals on the new page and note where they hesitate.
One warning matters more than the rest. If you rebuild a sandbox, any Canvas changes you have not deployed are lost. Deploy finished work, or note it down, before anyone refreshes the sandbox. Our post on intermediate Zoho CRM covers other features you may want to test at the same time.

Making the Canvas layout fit laptops and mobiles with Flex
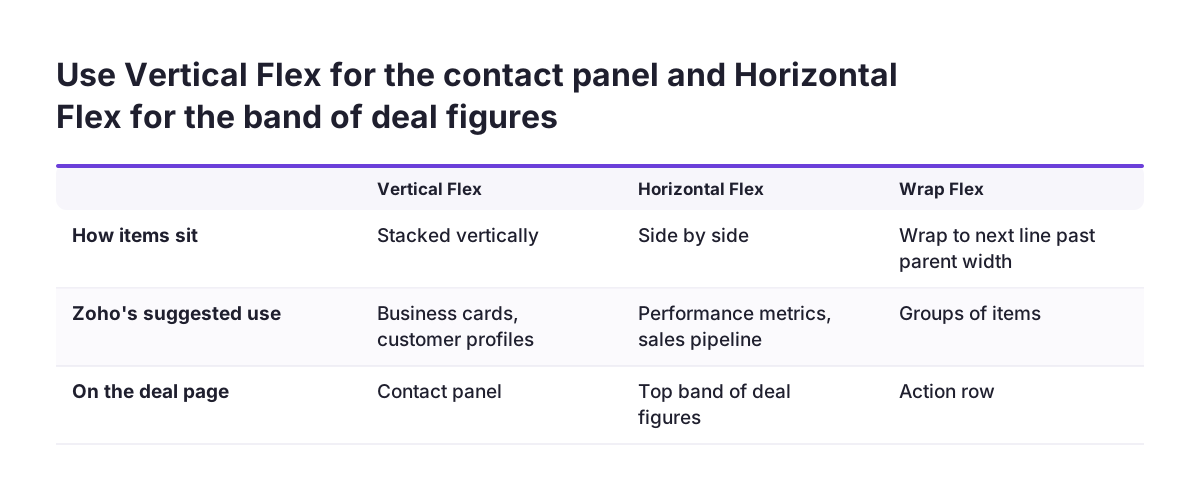
Flex is a Canvas component that makes a layout responsive, so it adapts across different screen sizes and devices. Without it, a page designed on a large office monitor can look cramped on a laptop. Zoho introduced Flex as a new component for Canvas in Zoho CRM, and it comes in three types.
| Flex type | How it arranges items | Zoho's suggested use | On the deal page |
|---|---|---|---|
| Vertical Flex | Items stack vertically | Sequential information, such as business cards or customer profiles | The contact panel |
| Horizontal Flex | Items sit side by side | Comparisons, such as performance metrics or sales pipeline | The top band of deal figures |
| Wrap Flex | Items wrap to the next line when they exceed the parent width | Groups of items that must not overflow | The action row of buttons |
Two tools control how items inside a Flex component behave. Auto Responsive repositions or resizes items while keeping a default minimum width for all of them. Auto Column arranges items into rows based on column count, which prevents overlapping without manual adjustment. You cannot select both for the same component; choosing one deselects the other.
Smaller tools refine the result. Flex Item Hug lets an element shrink or expand based on its content. Fill Width stretches components to the full width of a vertical Flex. If you already built sections, Convert to Flex turns several elements into one Flex component. Replace with Section and Replace with Flex swap between the two in the canvas builder.
Reusable components and style presets keep every Canvas page consistent
Reusable components and presets let you build a good element once and use it everywhere. In Canvas, components such as elements, style and field data form the structure of a template. Zoho's Canvas enhancements announcement describes both features, which are open to all users.
Reusable components
You can save a component from one template and use it in another. Components also work across modules. Zoho maps the field data from the original module to the matching fields in the new one. Before this, reusing a component meant recreating it, or cloning the template and deleting the extra parts each time. You can also start from pre-existing components in the gallery.
Style presets
Styles used to be copy-pasted within one template and could not travel to other canvases. Now you save a style as a preset and apply it to elements in different modules. Presets cover these element types:
- Text, label and value
- Field
- Section and page
- Tab
- Related lists
- Table
- Buttons
For the worked example, save the action row as a reusable component and the button style as a preset. When you later build an account page, the same buttons look and behave the same way. Your team learns one pattern, not five.
Deploying Canvas changes to production and avoiding conflicts
Deploy a tested Canvas page through the sandbox change set, not by rebuilding it by hand in production. In Zoho CRM, go to Setup > Data Administration > Sandbox. In the Change Set list, select the Canvas change items, which sit under components such as Canvas Detail view and Canvas Assignment. Then click Deploy Changes to Production.
The change set can hold several kinds of Canvas entry:
- Record detail page and list view page
- Custom list view, tile view and table view
- Canvas assignment and Canvas rule
- Reusable components, presets and images
When you update an existing page, check the change before you send it. Hover over the Canvas change item in the Change Set list and click See Difference. You see the sandbox version against the production version, which catches an old element you forgot you removed.
A deployment can also hit a conflict. Zoho lists three:
- Limits reached in production.
- The same name already exists in production.
- Required configuration is not present in the live environment.
The last one is the common trap. If your page uses a field you created only in the sandbox, production has nothing to show. Create the supporting configuration in production first, then deploy the page. Roll out to one team, gather a week of feedback and adjust before you assign the page more widely.
What redesigning record pages with Canvas means for a UK company
For a UK company, the main gain from Canvas is a record page that matches how your own team sells, not a generic layout. Many UK sales teams work in a hybrid pattern. People switch between an office monitor, a laptop at home and a phone between meetings. A Canvas page built with Flex keeps working across those screens, and Zoho states that Canvas covers desktop and mobile.
UK records often carry fields that matter only to some teams. VAT numbers, company registration numbers and billing contacts are vital to finance. A salesperson rarely needs them on screen during a call. Put those fields on the finance page, or in a tab on the sales page, rather than at the top of everyone's view.
Smaller UK firms also tend to have one person who owns the CRM part time. That person benefits most from presets and reusable components. They can change the look of every page from one place, not edit each page in turn.
If your sales team is split by region, decide how pages relate to your territories before you build. Our guide to territory management in Zoho CRM explains how to set territories up so they hold. Then design pages around tasks, which usually differ less by region than by role.
Next steps for redesigning your Zoho CRM record pages
Start small and finish one page properly before you touch the rest. A single well-designed deal page teaches you more than five half-built ones. Use this order:
- Check which Zoho CRM edition you have and whether Canvas is part of it. Zoho offers a 30-day free trial of Canvas with no credit card required.
- Confirm who holds the Manage Customization and Manage Sandbox permissions.
- Pick the module your team opens most, often Deals.
- Watch two or three people work real records and write down their fields and actions.
- Create a sandbox with Canvas included and build the page there.
- Use Flex for the top band, contact panel and action row, and test on a laptop and a phone.
- Save shared parts as reusable components and presets.
- Check See Difference, deploy through the change set and roll out to one team first.
Keep the task list you wrote in step four. When the process changes, update the list first and the page second. That keeps the record page tied to real work rather than drifting back into a long form.
If you would rather have help planning and building your pages, see how we approach Zoho CRM implementation and consulting for UK firms.